Prerequisites
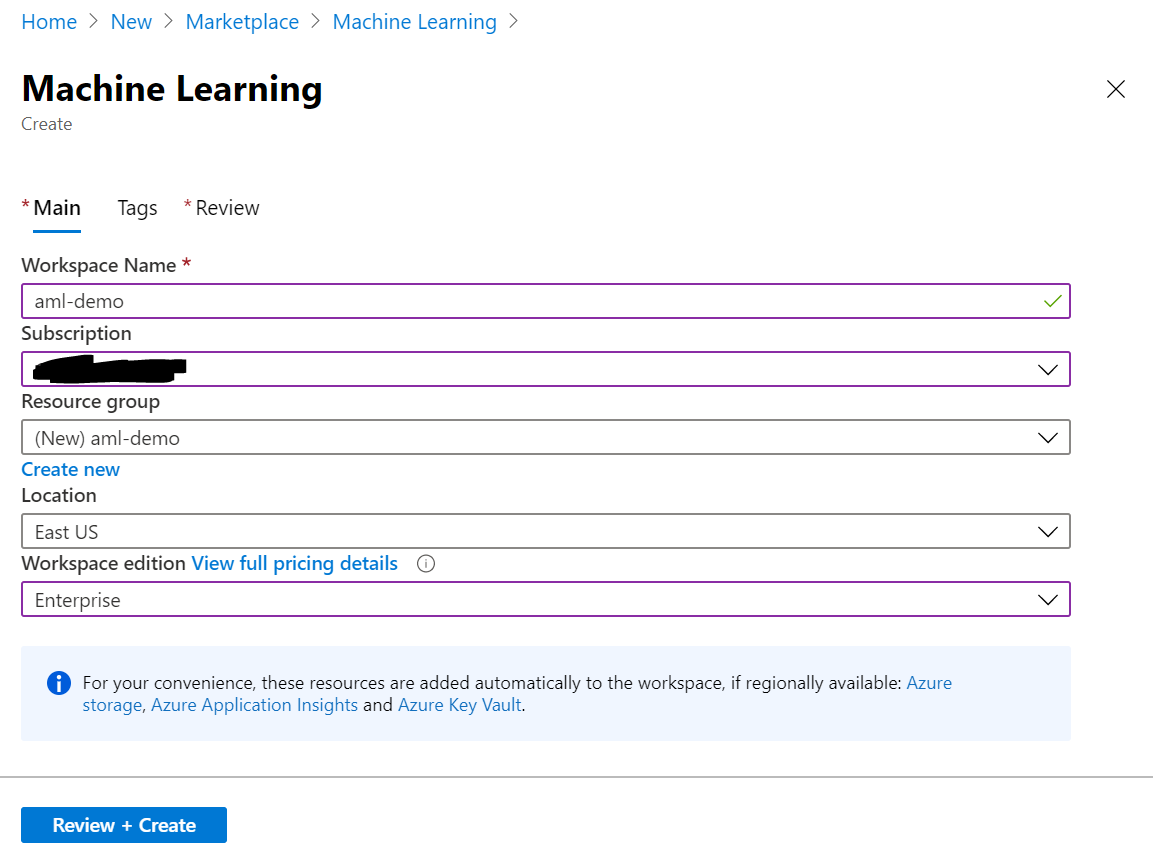
This tutorial assumes that you have an Azure Machine Learning service provisioned. If you do not have one yet, please follow this tutorial. This repo uses the following defaults:
- Workspace name:
aml-demo - Resource group name:
aml-demo - Workspace edition:
Enterprise

Depending on your preference, you can either work directly on your local laptop using Docker (Path 1), or remotely connect to a Compute Instance (Path 2). Both paths will work, but depending on your system restrictions (e.g., not full admin rights to your laptop), you might want to use Path 2.
Both paths cover how to leverage Azure Machine Learning for performing demanding, long-running training and batch-scoring jobs in the cloud.
Path 1 - Using your Local Laptop
Follow this path if:
- You want to work fully locally on your laptop
- You can fullfil all these prerequisites:
- You have full admin rights on your laptop
- You have
dockerinstalled (see here)
- Note: This path does not support local testing using GPUs
Some parts might already be fulfilled (editor, SSH keys), hence feel free to skip those steps.
-
Execute training Python code on local laptop using
pythonor startup script to make sure it is working properly - Install Azure CLI
- Login to Azure CLI
az login - Install the AZ ML CLI extension
az extension add -n azure-cli-ml
Path 2 - Using a Compute Instance
Follow this path if:
- You want (or are required) to work with a cloud-hosted machine in the background
- You do not have full admin rights on your laptop and have challenges installing, e.g.,
docker - Want the most proven way possible
Some parts might already be fulfilled (editor, SSH keys), hence feel free to skip those steps.
-
Execute training Python code on local laptop using
pythonor startup script to make sure it is working properly - Setup local editor with remote extension (Visual Studio Code or PyCharm)
- Option 1 - Install Visual Studio Code with Remote Development extension pack
- Install Visual Studio Code
- Install Remote Development
- Option 2 - Use existing PyCharm installation
- Install PyCharm (TODO)
- Setup Remote development (TODO)
- Option 1 - Install Visual Studio Code with Remote Development extension pack
- Generate SSH Key
- Open Terminal
- Generate SSH key using
ssh-keygen -t rsa -b 4096 - Open
~/.ssh/id_rsa.pubwith an editor of your choice and copy the public key
- Provision Compute Instance in Azure Machine Learning
- Open Azure Machine Learning Studio UI
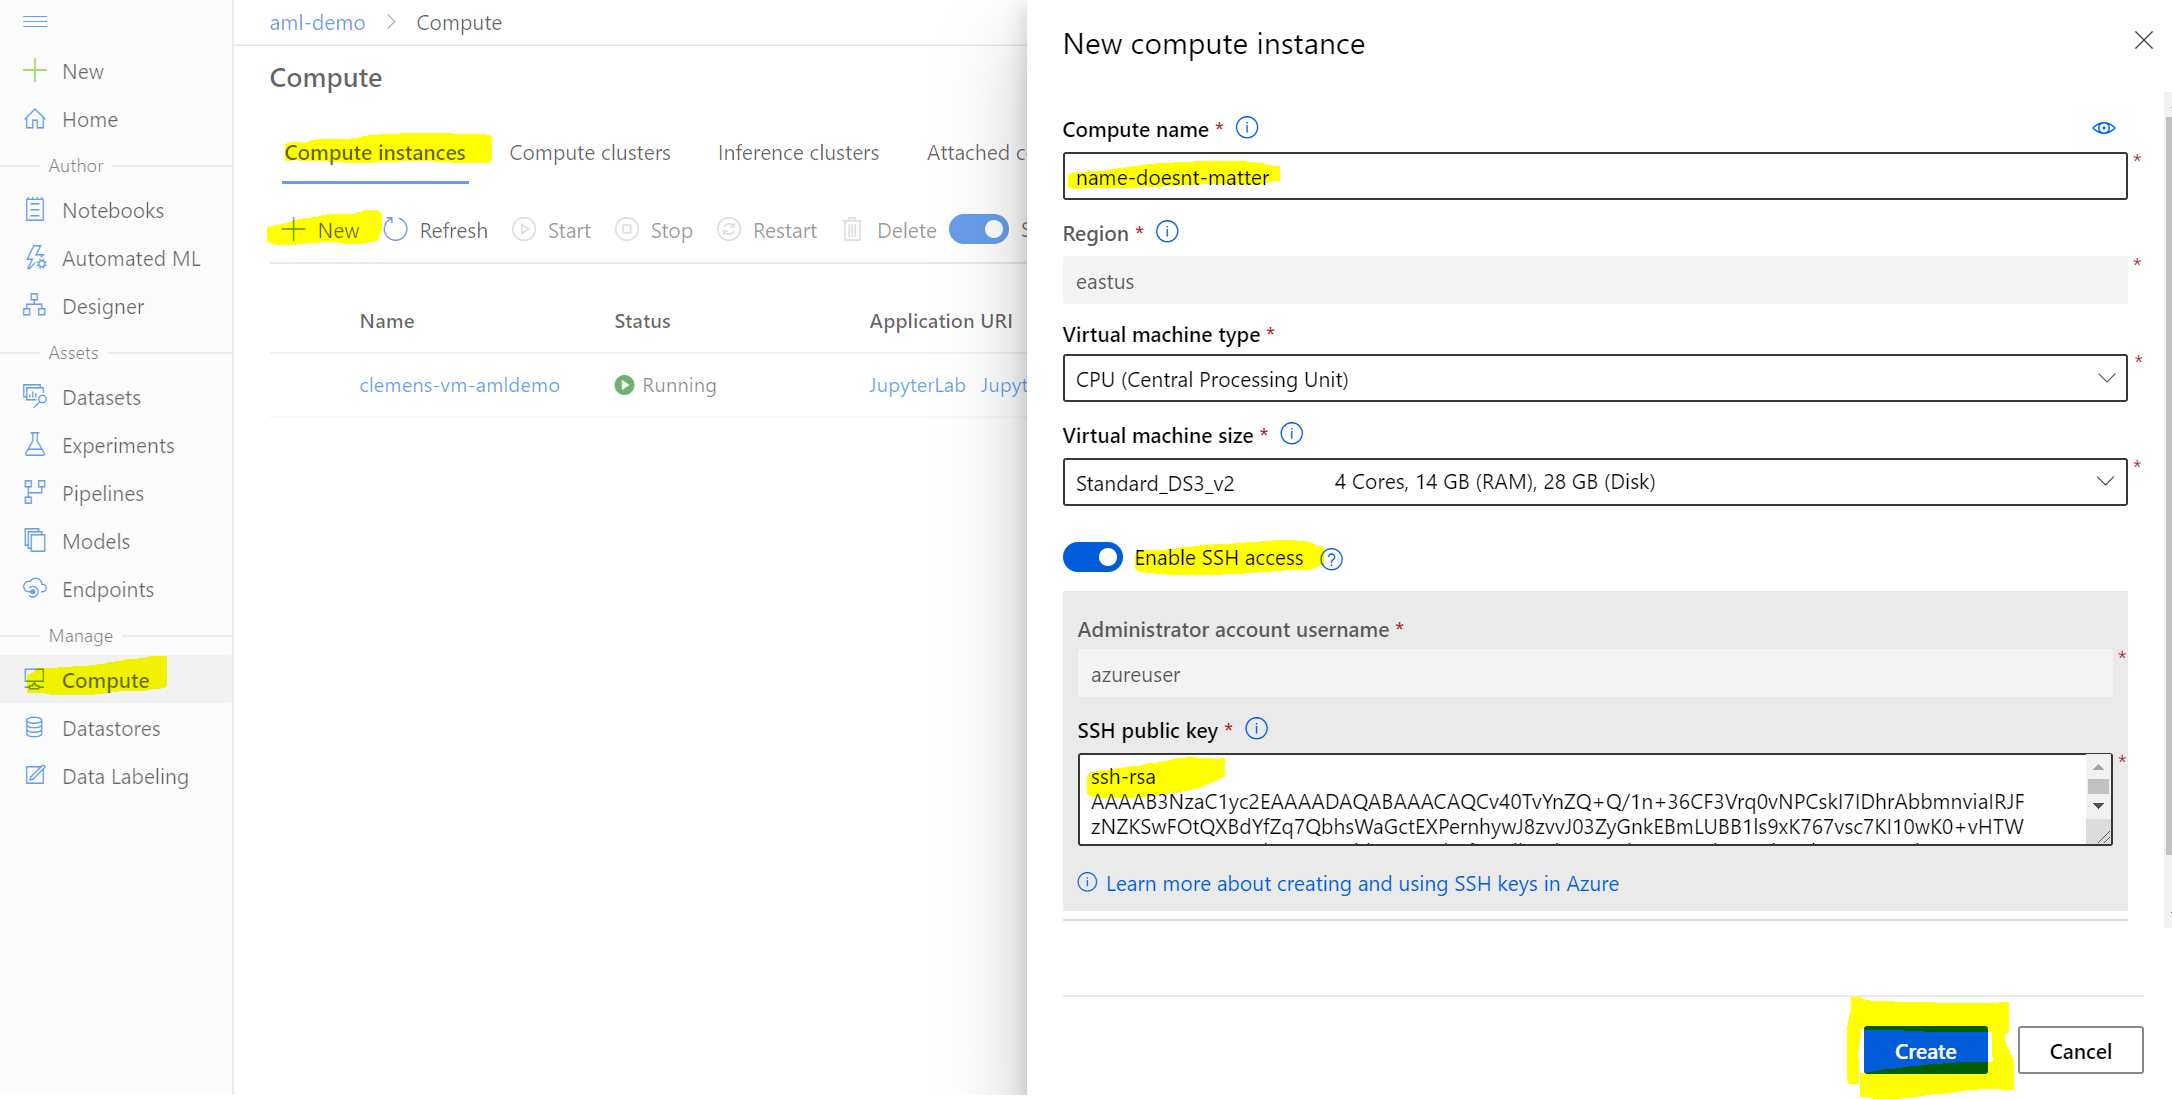
- Navigate to
Compute --> Compute Instances - Select
+ New - Select a
Compute name(doesn't matter) - Select a
Virtual Machine size - Enable
SSH Access - Paste your public key from
~/.ssh/id_rsa.pubinSSH public key - Hit
Create
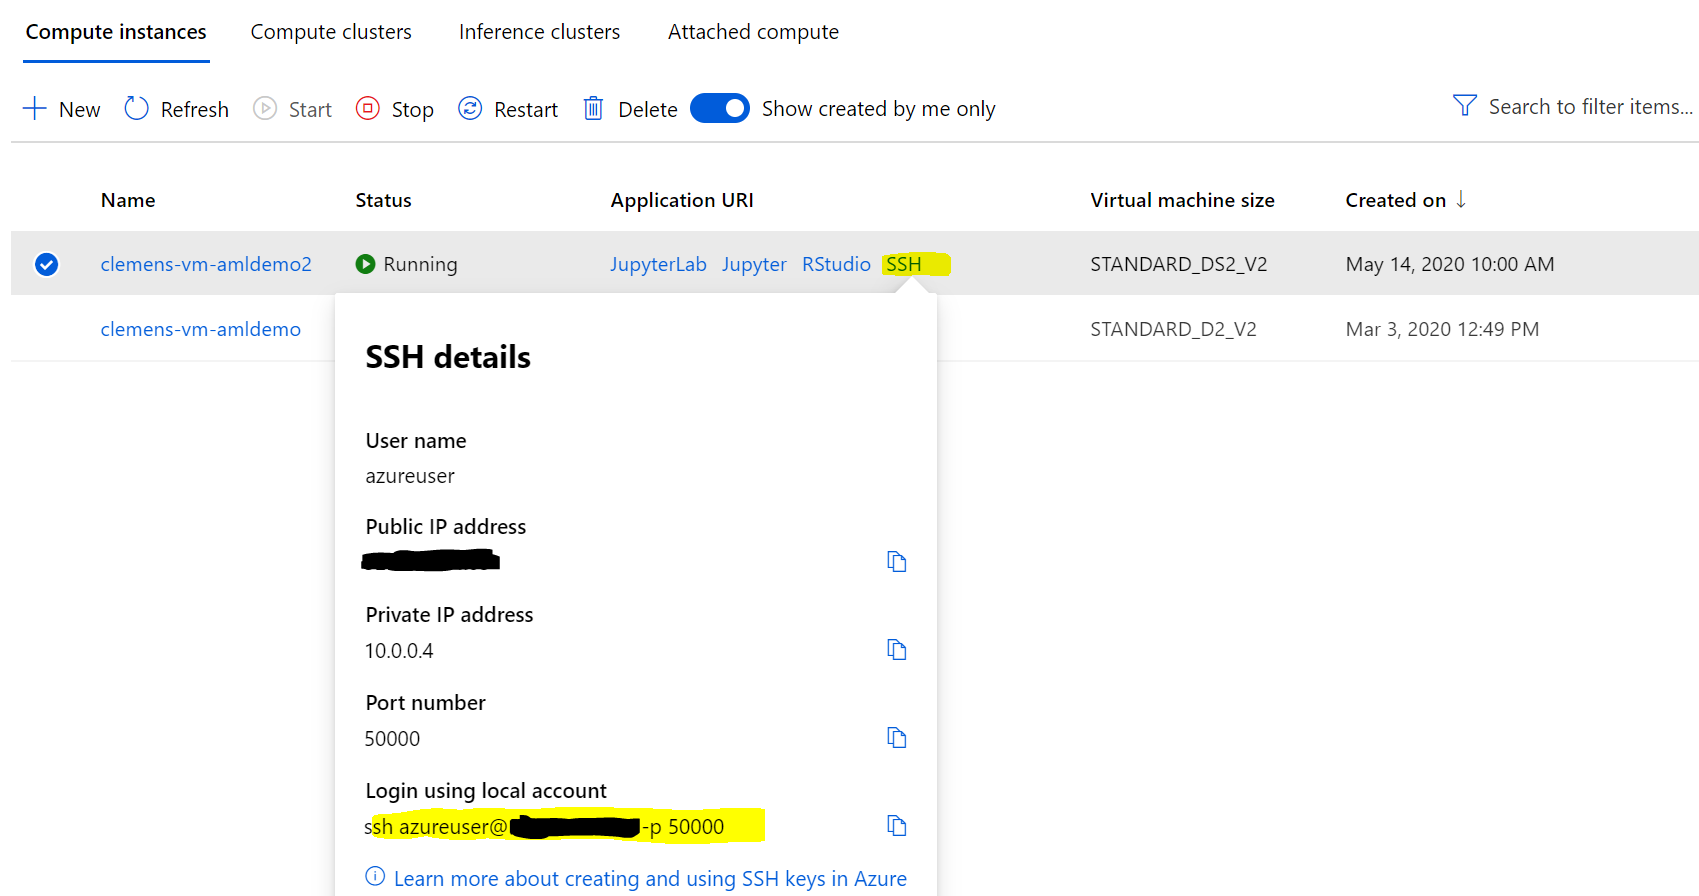
- Wait until instance has been provisioned
- Select
SSHunder Application URI and copy theLogin using local accountcommand

- Connect remotely to the Compute Instance
- Start
Visual Studio Code - Select
Remote Explorer - Click
+ Add new SSH Target - Paste copied command
ssh azureuser@*.*.*.* -p * - Save update to
C:\Users\username\.ssh\config(Windows) or~/.ssh/config(macOS, Linux) - Right-click the new
SSH Targetsentry and selectConnect to Host in Current Window
- Start
- Optional - Mount default Fileshare from Azure Machine Learning to local laptop
- Open the Azure Portal
- Navigate to your Azure Machine Learning's
Resource Group - Select the Azure Machine Learning's
Storage Account(named same as the Machine Learning service with some number, e.g.,amldemo12345678) - Select
File shares - Search for prefix
codeand select the matching file share
- Click
Connect - Follow the instructions to mount the share under Windows, Linux or macOS

Now that you have your environment up and running, we can move to the next section and migrate your training code to Azure.